Angkor Wat Photography Tips: Capture Stunning Temple Photos
Angkor Wat, a UNESCO World Heritage site and the largest religious monument in the world, is an awe-inspiring architectural masterpiece in Cambodia. [1, 5] Its intricate carvings, towering spires, and mystical aura draw millions of visitors each year, making it a dream destination for photographers. In 2024 alone, Angkor Archaeological Park welcomed 1,023,688 foreign tourists, marking a significant 28% increase compared to 2023. While its beauty is undeniable, capturing truly stunning photos of Angkor Wat requires more than just pointing and shooting. This comprehensive guide will equip you with the essential Angkor Wat photography tips, helping you navigate the crowds, master your camera settings, and discover the best angles to bring out the temple’s timeless grandeur.
Key Takeaways
- Plan your visit to coincide with the best light and fewer crowds, often found during the afternoon or off-season.
- Pack essential gear including a wide-angle lens, telephoto lens, and a sturdy tripod.
- Master basic camera settings like aperture, shutter speed, and ISO for varying light conditions.
- Look beyond the obvious and employ composition techniques like leading lines and framing.
- Explore various temples within the Angkor Archaeological Park for diverse photo opportunities.
- Respect local rules and culture, especially regarding photography of monks and sacred areas.
Planning Your Angkor Wat Photography Adventure
Careful planning is the first step to achieving exceptional Angkor Wat photos. Understanding the rhythm of the park, from crowd patterns to light conditions, will significantly impact your results.
Best Time to Photograph Angkor Wat (and Why!)
Choosing the right time to visit is perhaps the most crucial of all Angkor Wat photography tips. The interplay of light, shadows, and crowds dramatically changes throughout the day.
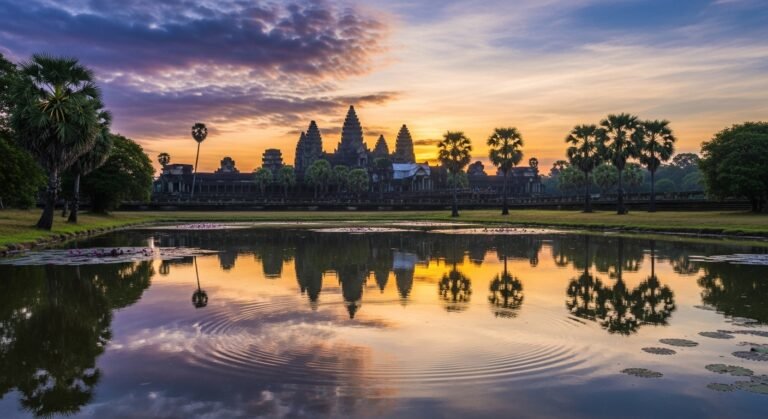
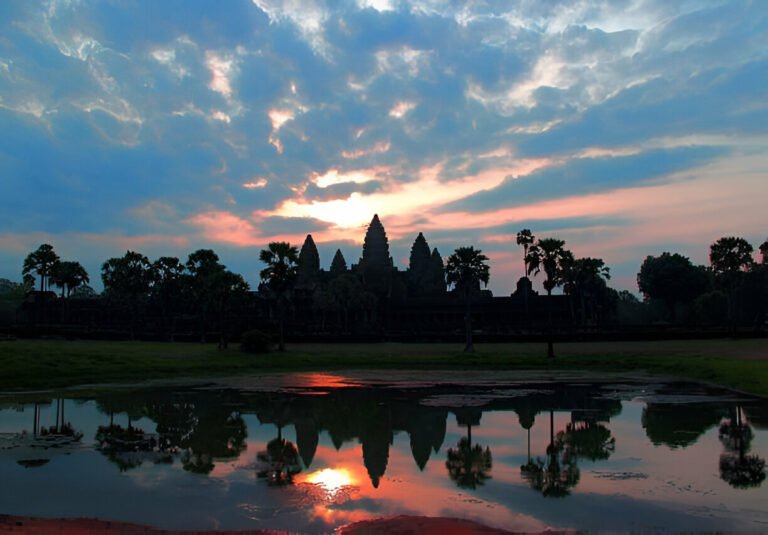
- Sunrise Angkor Wat Photography (Early Morning): Witnessing the sunrise over Angkor Wat is a quintessential experience, but be prepared for company. Peak morning hours, between 5:00 AM and 11:00 AM, attract 58% of all daily visitors, with the famous reflection pools potentially seeing over 500 people. [DATA] While iconic, photographers rate morning rush times at 6.0/10 for photo quality due to crowds. Morning visits overall receive an 8.2/10. [DATA]
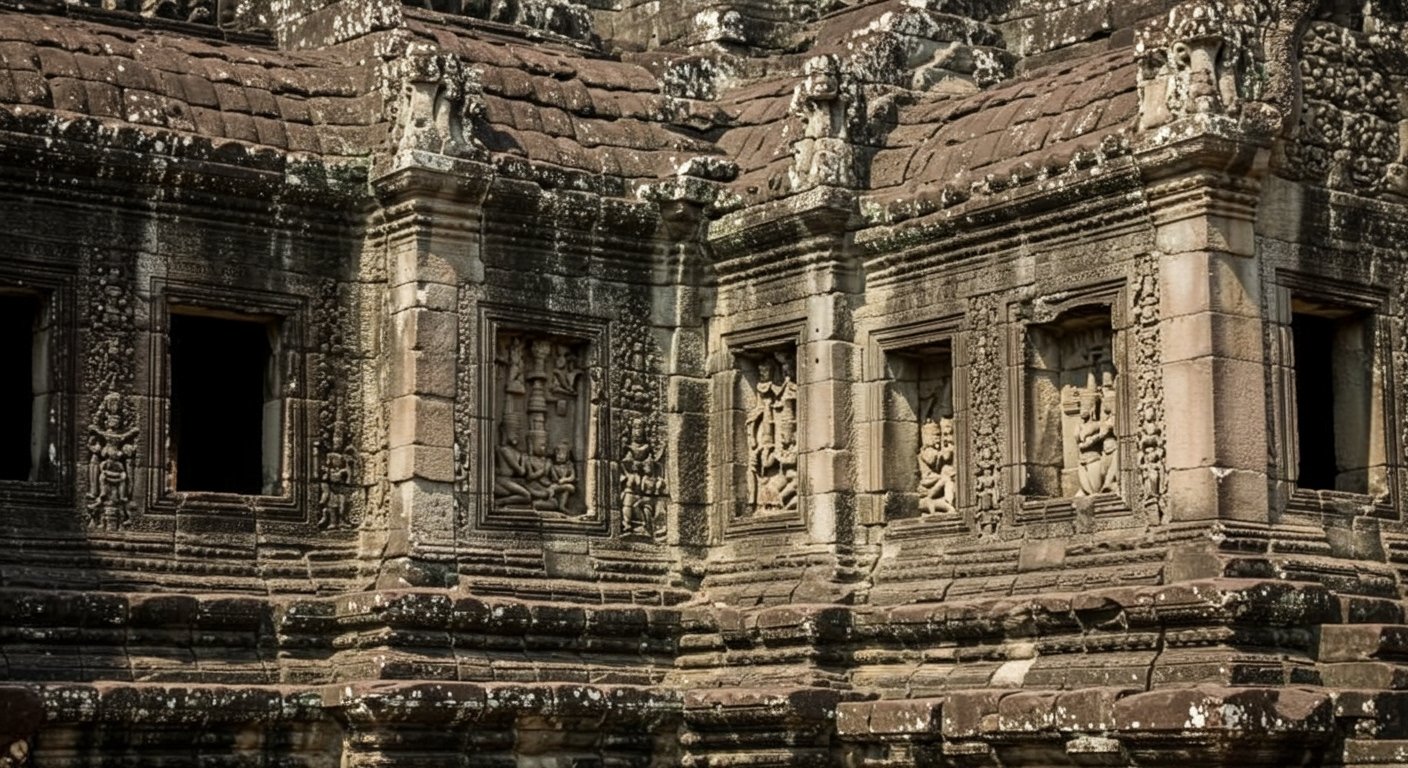
- Midday Opportunities (12:00 PM – 2:00 PM): Often overlooked, midday periods offer an 83% reduction in crowds compared to peak times. [DATA] The harsh overhead light can be challenging, but it’s an ideal time for capturing details, bas-reliefs, and intricate carvings that are less crowded. Consider using the shade or focusing on interior shots.
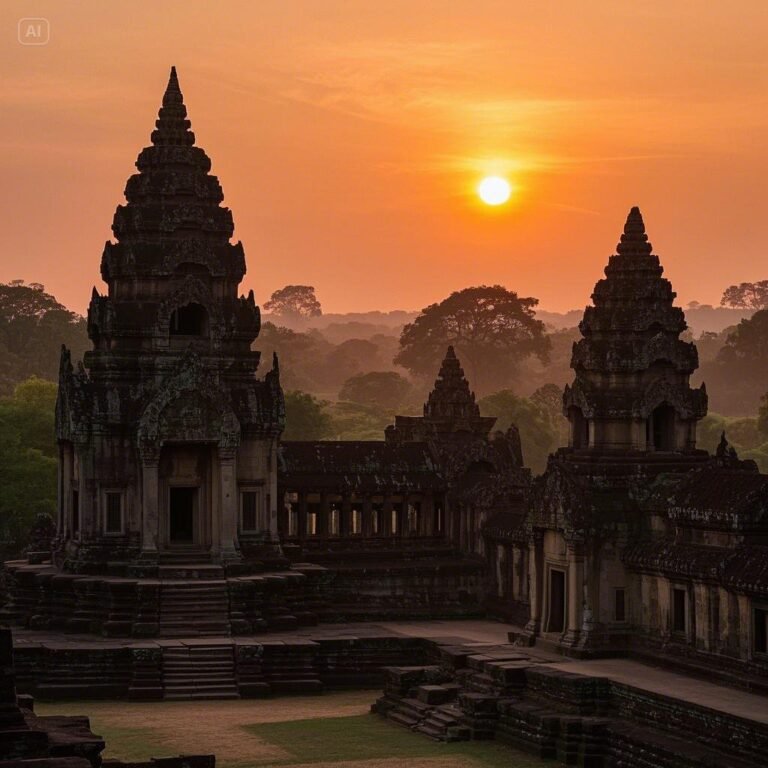
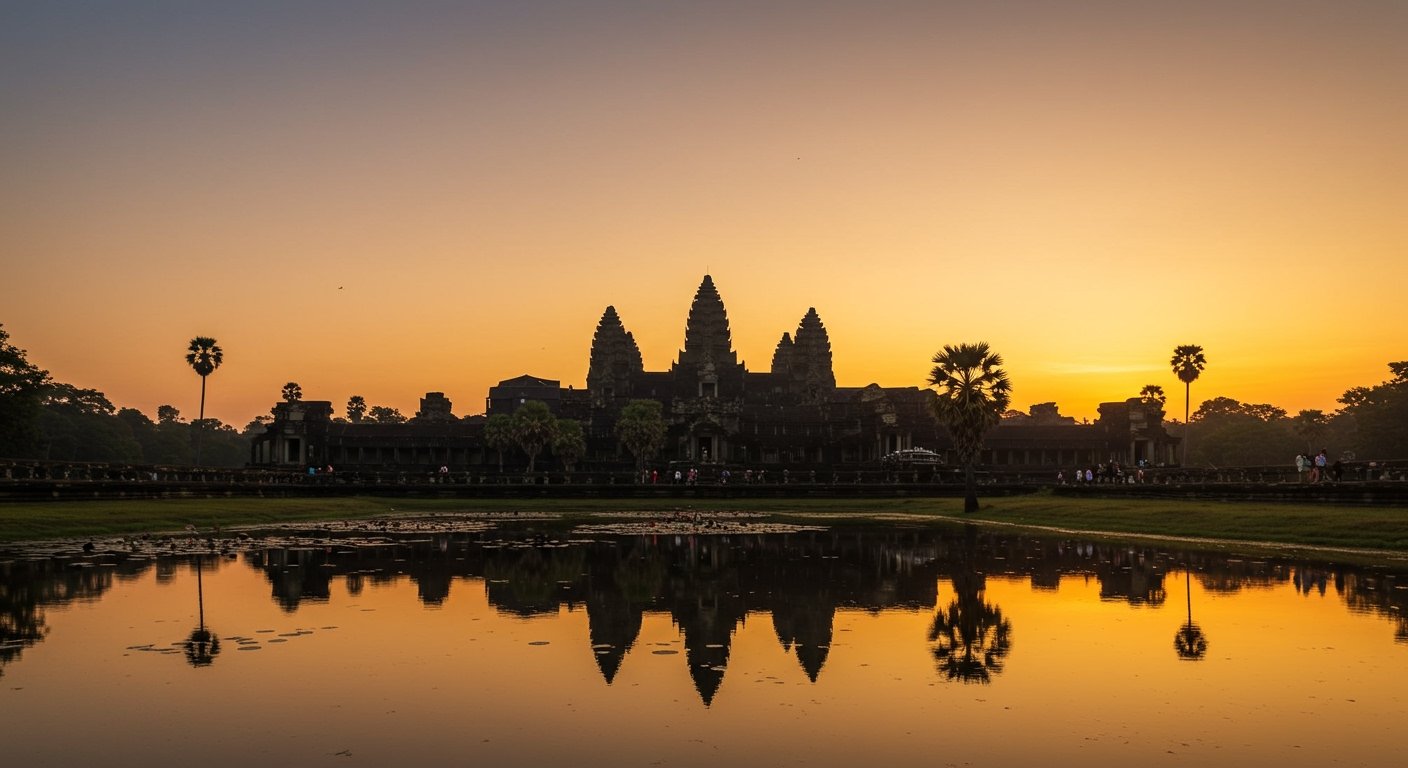
- Golden Hour Angkor Wat Photos (Afternoon): Many photographers swear by the afternoon for the best time to photograph Angkor Wat. Afternoon visits (3:00 PM – 5:00 PM) account for only 27% of the daily visitor volume, offering a more relaxed experience. [DATA] More importantly, photographers rate afternoon visits at Angkor Wat an impressive 9.1/10 for photo quality, thanks to the warm, soft light of the golden hour. [DATA] This is ideal for capturing the rich ochre tones of the sandstone.
- Busiest Season: The period from November to March is the busiest season for visiting Angkor Wat due to cooler and drier weather conditions, attracting significant crowds. [DATA] If you prefer fewer people, consider the shoulder or off-seasons, though you might encounter more humidity or rain.
Essential Photography Gear for Angkor Wat
Having the right tools is key for how to get good pictures at Angkor Wat:
- Camera Body: A DSLR or mirrorless camera offers the best flexibility and image quality.
- Lenses:
- Wide-angle lens (16-35mm or wider): Indispensable for capturing the vastness of the temples and grand landscapes, especially during sunrise.
- Telephoto lens (70-200mm or longer): Great for isolating architectural details, capturing distant elements, or compressing perspectives.
- Standard prime lens (e.g., 50mm f/1.8): Excellent for low-light situations and creating beautiful bokeh for portraits within the temple complex.
- Tripod: Absolutely crucial for sunrise/sunset shots, long exposures, and maintaining sharpness in low light. Choose a sturdy, yet portable one.
- Filters:
- ND (Neutral Density) filter: Helps reduce light, allowing for longer exposures in bright conditions, perfect for blurring moving clouds or water.
- Polarizer filter: Reduces glare from reflections (like the reflection pools) and enhances sky color.
- Extra Batteries and Memory Cards: You’ll be taking a lot of photos; don’t run out of power or space!
- Cleaning Kit: Dust, humidity, and heat are common in Cambodia, so lens cloths, a blower, and brushes are essential.
- Comfortable Bag: You’ll be walking a lot, so a comfortable camera backpack that protects your gear is vital.
Discovering the Best Angkor Wat Photo Spots & Itinerary
Angkor Archaeological Park is immense, filled with countless opportunities for unique photographs. An Angkor Wat photo itinerary is a must to make the most of your time.
What to Photograph at Angkor Wat and Beyond
Beyond the iconic main temple, the park offers diverse Angkor Wat photo spots:
- Angkor Wat:
- Sunrise Reflection Pools: The classic shot. Arrive early to claim a good spot for sunrise Angkor Wat photography.
- Western Gopuara: The entrance pavilion offers great framing opportunities.
- Bas-reliefs: Intricate carvings telling Hindu myths. A telephoto lens or macro lens is great here.
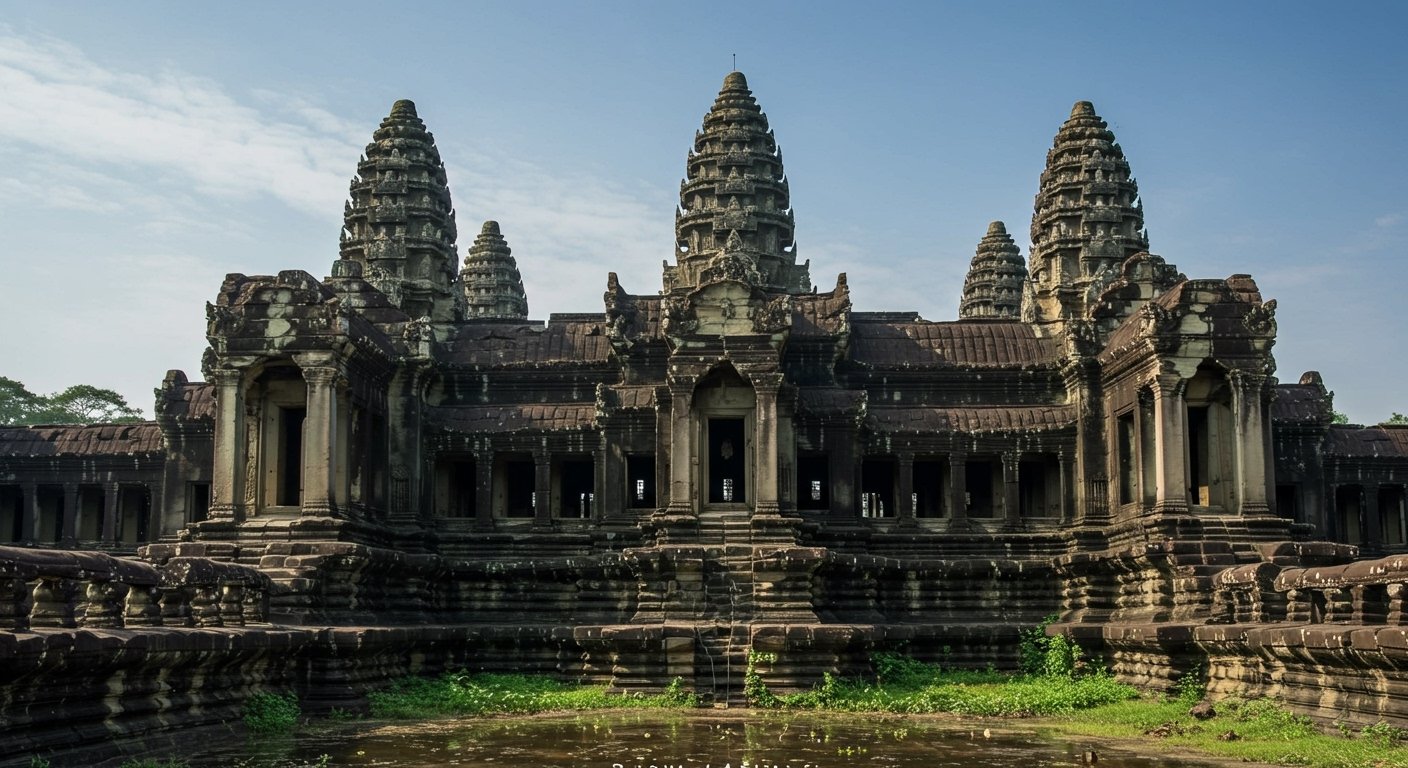
- Central Towers: Focus on the grandeur and symmetry.
- Angkor Thom: A walled city containing several temples:
- Bayon Temple: Famous for its smiling face towers. Capture the mysterious expressions.
- Baphuon: A massive temple-mountain with a reclining Buddha on its western side.
- Terrace of the Elephants & Terrace of the Leper King: Great for detailed carvings.
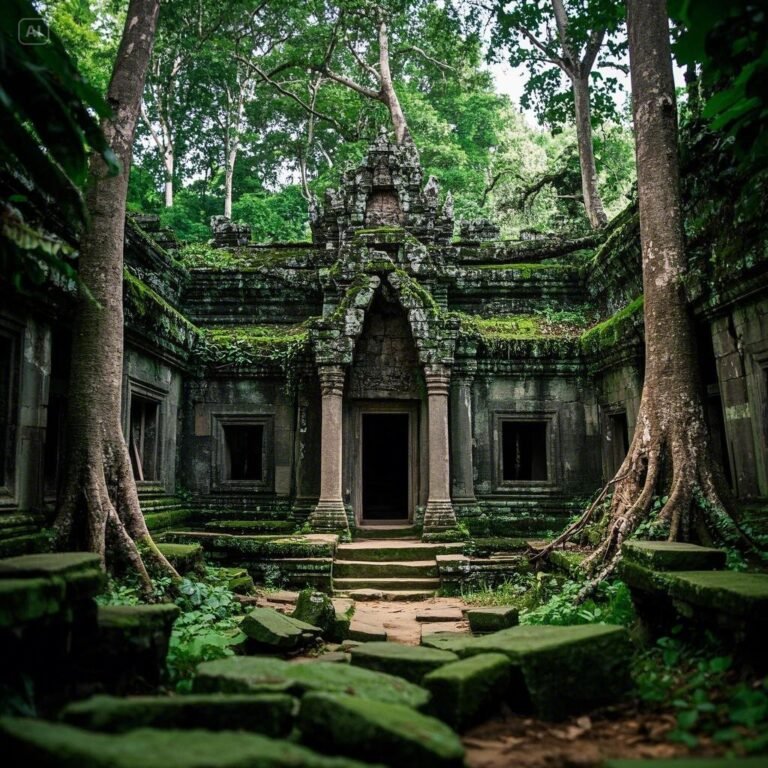
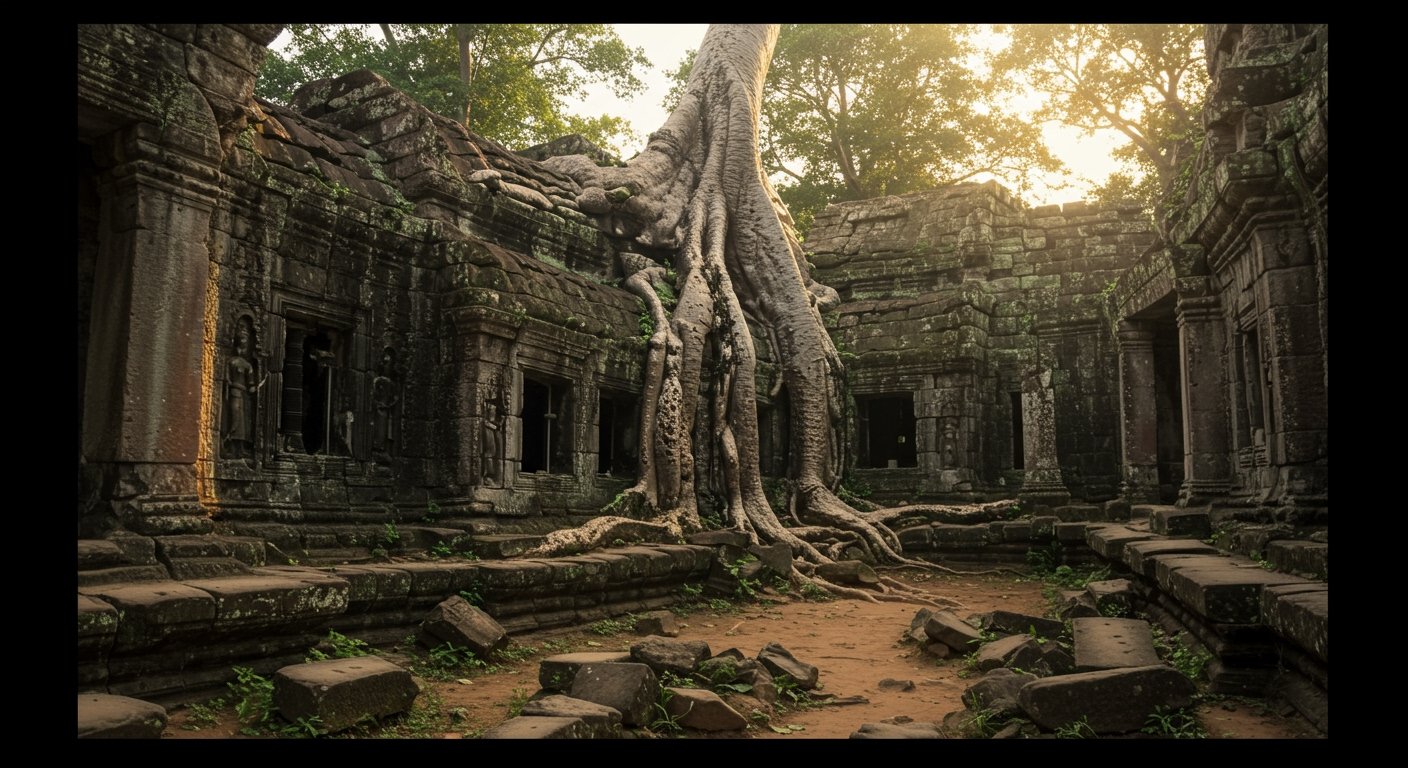
- Ta Prohm: Known as the “Tomb Raider temple,” where massive trees intertwine with ancient stones. This offers incredible opportunities for capturing nature reclaiming history. Look for interesting compositions with roots and ruins.
- Banteay Srei: The “Citadel of Women” is known for its incredibly detailed and well-preserved pink sandstone carvings, offering unique photo subjects away from the main complex.
- Preah Khan: Another sprawling jungle temple with fascinating corridors and tree roots, similar to Ta Prohm but often less crowded.
For a detailed Angkor Wat photography guide, consider exploring specific routes and an Angkor Wat photography locations map to optimize your journey and avoid retracing steps.
Mastering Camera Settings and Composition for Angkor Wat
Once you’re on location, knowing your camera and applying good composition techniques are vital tips for photographing temples Cambodia.
Camera Settings Angkor Wat: Getting it Right
- Aperture (f-stop): Controls depth of field.
- For sweeping landscapes and temples where you want everything in focus, use a smaller aperture (higher f-number like f/8 to f/16).
- For isolating details or portraits, use a wider aperture (smaller f-number like f/2.8 to f/5.6).
- Shutter Speed: Controls how long the sensor is exposed to light.
- For handheld shots in good light, aim for 1/125s or faster. For moving subjects, go even faster.
- For long exposures (e.g., blurring clouds or water, or for night photography), use a tripod and a slower shutter speed (seconds or even minutes).
- ISO: Controls the sensor’s sensitivity to light.
- Keep ISO as low as possible (100-400) for the cleanest images, especially in good light.
- Increase ISO (800-3200+) only when necessary in low light, understanding it will introduce more noise (grain).
- White Balance: Set it to ‘Daylight’ or ‘Cloudy’ for natural colors, or use ‘Auto’ and adjust in post-processing. For sunrise/sunset, ‘Cloudy’ or ‘Shade’ can enhance warm tones.
- HDR (High Dynamic Range): The temples often present high contrast between bright skies and shadowy interiors. Use your camera’s HDR mode or bracket your shots (take multiple exposures at different settings) to capture detail in both highlights and shadows. This is a powerful technique for challenging lighting.
Angkor Wat Composition Tips: Beyond the Obvious
Good composition transforms a snapshot into a work of art:
- Rule of Thirds: Divide your frame into nine equal sections with two horizontal and two vertical lines. Place points of interest along these lines or at their intersections.
- Leading Lines: Use architectural elements like corridors, walls, or pathways to draw the viewer’s eye towards your main subject.
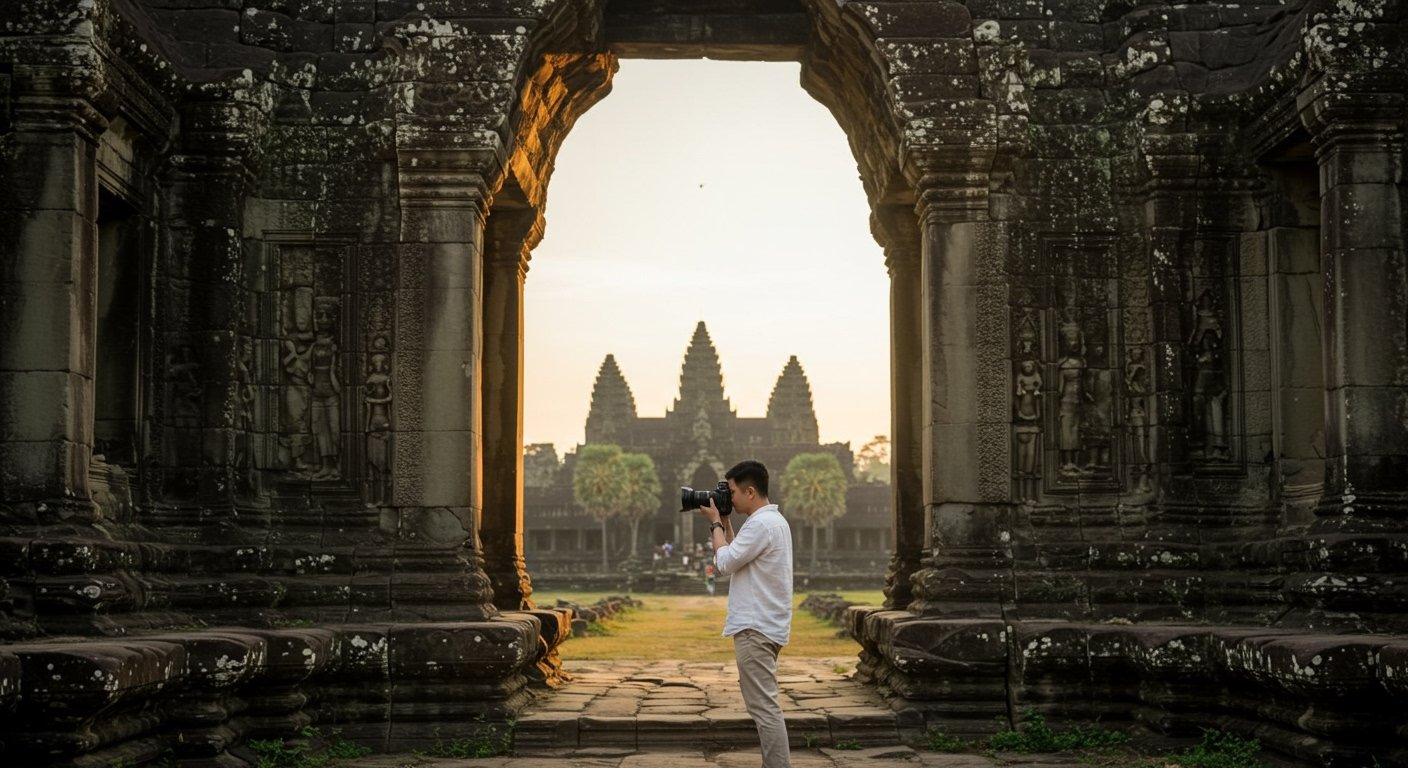
- Framing: Use doorways, archways, or tree branches to naturally frame your subject, adding depth and context.
- Symmetry: Angkor Wat’s architecture often features strong symmetry, especially at the main temple. Utilize this for powerful, balanced compositions.
- Capture Details: Don’t just focus on the grand scale. Zoom in on intricate carvings, weathered stones, or the texture of ancient moss.
- Include People (Respectfully): Sometimes, including a person can provide a sense of scale and human element. Always ask for permission before photographing individuals, especially monks. Be mindful of Angkor Wat photography rules regarding respectful behavior and attire.
Overcoming Challenges: Crowds and Light
Angkor Wat’s popularity can present photographic challenges, but with the right strategies, you can still capture stunning images.
- Dealing with Crowds: As mentioned, mornings are packed. To avoid crowds, consider visiting popular spots during midday or later in the afternoon. Early morning also works for less popular temples. Utilize long exposures to make people disappear if they are moving, or compose your shots to focus upwards, beyond the heads of tourists. For more in-depth strategies, refer to our guide on how to avoid crowds at Angkor Wat.
- Managing Harsh Midday Light: When the sun is high and bright, use it to your advantage. Look for interesting shadow patterns, focus on well-lit details, or seek out shaded areas within the temples. This is also a good time to visit some of the smaller, covered temples or explore the shaded corridors. As discussed, the afternoon golden hour offers superior light quality. For more on optimizing your visit for light, check out our article on sunrise or sunset at Angkor Wat.
- Night Photography: The temples take on a completely different, mystical character after dark. With the right gear (a sturdy tripod and a fast lens) and techniques, you can capture breathtaking night photography at Angkor Wat photos.
Editing Angkor Wat Temple Photos
Editing is the final step in bringing your Angkor Wat images to life. Basic adjustments can make a significant difference:
- Exposure and Contrast: Adjust these to reveal details in both shadows and highlights.
- White Balance: Fine-tune for accurate or artistically warm/cool tones.
- Highlight and Shadow Recovery: Essential for balancing the dynamic range, especially in shots with bright skies and dark temple interiors.
- Clarity and Dehaze: Can enhance the texture and depth of the ancient stones, cutting through any atmospheric haze.
- Cropping and Straightening: Improve composition and correct any tilted horizons.
- Color Correction: Boost the natural colors of the sandstone, sky, and greenery without over-saturating.
Respecting the Site and Culture
Remember, Angkor Wat is not just a tourist attraction; it is a sacred religious site and a testament to the ancient Khmer civilization. [1, 12] Adhere to all posted Angkor Wat photography rules, dress respectfully, and be mindful of monks and worshippers. Your visit contributes to the preservation of this incredible heritage, which has been under the safeguard of UNESCO since 1992. [5]
With these Angkor Wat photography tips, you’re well on your way to capturing images that not only showcase the beauty of these ancient temples but also tell a compelling story of your journey. Happy shooting!